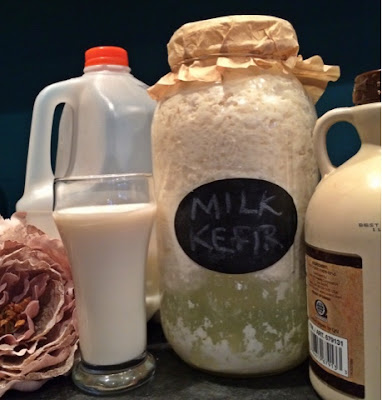
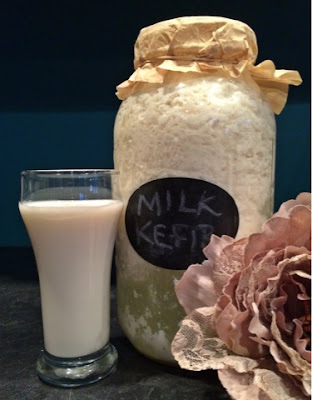
Milk Kefir is the drink for you!
It has changed my life. I have severe IBS and have been on a variety of medications for 5 years. None of these have really worked. Before Milk Kefir, I was on a regiment of Linzess 290, plus 1 to 2 doses of Miralax every day - and it still was only marginally better!
Now I drink a glass or two of Milk Kefir, one first thing in the morning and sometimes one in the evening, if I just want one or feel a little bloated. It is a bit of an acquired taste, but I now absolutely love the recipe that I am about to share with you.
The best way to get your grains is to find a friend with some. They will gladly give you enough to start your own 1/2 gallon batch, which is about 1/2 cup. I know this because I am currently overrun with Milk Kefir. I have 2 cups sleeping in the fridge and another cup in rotation making Kefir. I have a friend stopping by today to pick up some Kombucha starter for a friend and I plan on forcing her to take some Milk Kefir starter for both her friend and herself. I just can't bring myself to throw them away! They are my little civilizations and I feel I must protect them. (I, obviously, need a pet.) I may resort to using some as fertilizer in my garden or throwing some in smoothies. These grains reproduce like bunnies if they are happy and well-cared for.
Now I drink a glass or two of Milk Kefir, one first thing in the morning and sometimes one in the evening, if I just want one or feel a little bloated. It is a bit of an acquired taste, but I now absolutely love the recipe that I am about to share with you.
The Grains
First, they are not actually grains, but a SCOBY (Symbiotic Culture of Bacteria and Yeast), just like Kombucha has a SCOBY. Kefir SCOBY's have a very different look and feel than Kombucha. While Kombucha is one large jellyfish/mushroom-like mass that floats at the top of the tea during fermentation, Kefir SCOBY's more resemble a clearer cottage cheese.The best way to get your grains is to find a friend with some. They will gladly give you enough to start your own 1/2 gallon batch, which is about 1/2 cup. I know this because I am currently overrun with Milk Kefir. I have 2 cups sleeping in the fridge and another cup in rotation making Kefir. I have a friend stopping by today to pick up some Kombucha starter for a friend and I plan on forcing her to take some Milk Kefir starter for both her friend and herself. I just can't bring myself to throw them away! They are my little civilizations and I feel I must protect them. (I, obviously, need a pet.) I may resort to using some as fertilizer in my garden or throwing some in smoothies. These grains reproduce like bunnies if they are happy and well-cared for.
We have been sticking to the Scooby and gang theme, so we call our Milk Kefir grains Fred, because, um, he's a very, very, white boy.
If you can not get one from a friend, I recommend ordering this one:
You also need the following equipment:
If you can not get one from a friend, I recommend ordering this one:
You also need the following equipment:
- At least 3 half gallon mason jars
- a large plastic funnel
- a large plastic strainer
- a bamboo or wooden spoon
- coffee filters
- a rubber band
- reCAP large size (optional, but nice to have)
- glass flip-seal bottles (optional)
The Milk
Normally, I would say, use organic. We prefer organic in both cooking and drinking. However, most mass produced organic milks are ultra-pasturized; that is why they last so long in our fridge and we can buy the little boxes of it not refrigerated to send to school with our kiddos. Ultra-pastured is not good for the process as it removes some of what is necessary to ferment. If you have a raw milk source that you trust, many people use raw milk. I do not have access to raw milk, so I buy regular milk from companies that do not use hormones or antibiotics on their cows. It seems to be a good compromise and the Kefir comes out tasting wonderful and with all the probiotics that our bodies, particularly our gut, need.Now to the basic recipe, finally!
Do not use anything metal.
Honestly, I can't explain why, but all the fermenting gurus say this, so I am passing it along.
- If you have 1/4 cup grains, start in a quart mason jar (or only fill the half gallon half way). You will quickly (within a week or so) be ready to move up to a full half gallon.
- If you have 1/2 cup grains, start in a half gallon mason jar.
- Pour either a quart or a half gallon (see above) of milk into the mason jar.
- Gently add the Milk Kefir grains.
- Cover with a coffee filter held in place with a rubber band.
- Allow to sit out of direct sunlight for 24 to 36 hours. The curd will separate from the whey. That is what I actually wait to happen. When there is a descent amount of separated whey, it is time to strain.

This is after 36+ hours with 3/4 cup grains.
It is a little more separated than I would like,
but it still looks good. - First I stir it a little with bamboo spoon.
- Then pour small amounts at a time into another half gallon mason jar through the large plastic mesh strainer and funnel. Use the spoon to gently move around the grains the push through the cream and whey.
- Place grains into third half gallon mason jar.
- Repeat pouring small amounts through the strainer and placing grains into third jar until you have gone through all the kefir.
- Fill third mason jar, now with all the grains, with milk. (If you are still below 1/2 cup, wait to completely fill the jar. If you have at least 1/2 cup, fill that jar up!) You will probably be able to tell the grains have grown after your second or third rotation. They need a little time to wake up after delivery. If they are given to you from a friend, you might see a difference after the very first batch!
- Take the strained Kefir and either do a second fermentation with flavoring (Add flavor and seal the jar with the mason jar lid.), or take to your fridge because it is ready to drink. It will continue to very slowly ferment even in the fridge. We will discuss second fermentations in a future post.
- My favorite way to drink it is to add maple syrup to taste after the first fermentation and take it directly to the fridge. It's a very simple, but yummy flavor. I thoroughly enjoy it.
Any questions or suggestions? Please leave them in the comments. I look forward to your ideas and questions!


